|
Nothing like a fresh coat of ZAINO
to make things right with the world
UPDATE 6/22/2002
Well, the trusty
’99 has been retired. It was a great car for 3 years, but the draw of
405 hp forced me to trade in for a 2002 Millennium Yellow Z06. I won’t
be updating this page anymore so it’s here for posterity.
Click HERE to go
to my new Z06
page
I bought my 1999 C5 in August of '99 from Courtesy
Chevrolet in San Jose, CA. After several years of wanting,
I was able to get a good deal on a used one with only 6000 miles. I was very
particular about what colors and options I wanted, and this car was almost
perfect. So I got it. The biggest "impulse buy" I've ever made.
The beautiful color you see is "Torch Red",
with the Light Oak interior. In stock form it came with the 6-speed manual
tranny, In-dash CD player, sport seats, and clear roof panel option. I had
the dealer add the factory 12 CD changer, and immediately I upgraded the
suspension to the Z51 sport package with take-off parts from Mallet, and bodyside
moldings. After that -- the mod addiction began.
All of the mods that I've done (except for the x-pipe)
are "bolt-on". I'm a warrantee nut and didn't want to do anything
that would void it. All the upgrades are completely reversible if I needed
to, so it's going to be 5yrs/75,000 before I consider the Lingenfelter Twin
Turbo setup ;)
|
|
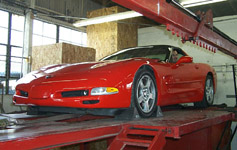
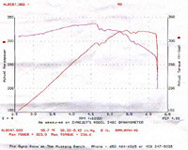
What does all this mean? Check
out the results of my Dyno runs. With just the intake and ported MAF, I'm
putting out 323 RWHP! Can't wait to see if the Corsa system added anything.
click for larger images
|
|
C5 Alarm Upgrade
This is a great tech tip to
upgrade the stock C5 alarm system to use a Shock Sensor and Proximity Sensor.
VERY easy to do, and takes less than a hour!
|
|
Donaldson LS6 Airbox
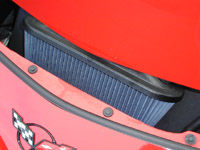
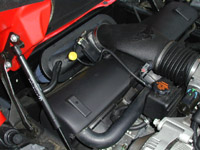
My 1st upgrade was to remove
the stock (VERY restrictive) airbox and replace with a better flowing unit.
Although there are several great units to choose from (including the Halltech
Tric and Vortex units), I chose the Donaldson LS6 for one main reason -- ease
of install. The Donaldson is an OEM style piece that fits right in the stock
location, using the stock mounts, and requires no cutting (all of the
"bottom breathers" need a little surgery to work properly).
Installation takes about 5 minutes, requires no tools, and looks pretty cool.
click for larger images
Intake Links
Donaldson Home Page
Vortex ram-air
intake
Halltech Systems Tric
Intake
Pro-flow+
cold-air system
Buy from "Xtreme
Motorsports"
|
|
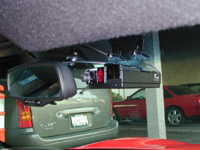
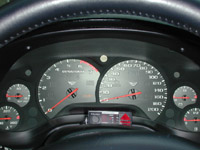
Valentine 1 Radar Detector with
Concealed Display
If you buy nothing
else for your car, buy this. Don't think about another detector. This this
the only one worth the money, IMHO.
I don't consider
myself a speeding driver, in general, but it took me all of 3 weeks to get my
1st ticket in the new Vette. It only took one more week before the V1 was
installed :) So far, it has saved me twice, and alerted me to speed traps
many times.
Installation is
simple -- there is an accessory harness behind the passenger footwell that
was made for hard-wiring this to the car. I put the detector just behind my
rearview mirror so that it's basically invisible if you're not looking for it
(and cops can't see it from the drivers side or back of the car). I use the
concealed display unit right on my steering column so I don't have to look
away to check what's happening. Check the Car and Driver link below for an independent
test of several different units, and you'll see why I went with the V1.
click for larger images
Valentine 1 Links
Valentine 1 home page
Car and Driver article on high end radar detectors
Programing information on the V1
V1
installation instructions
Mirror mount
unit
|
|
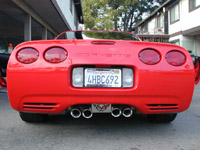
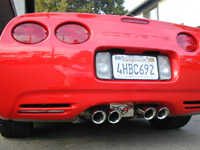
Corsa Pace Car Exhaust
There are several excellent
exhaust systems available for the C5. After doing some research, I chose the
Corsa "Pace Car" system, which, I believe, is the most aggressive
sounding (read: LOUD) of all the mufflers. The Pace Car version is what
Chevrolet chose to replace when their pace car lead the 1998 Indy 500. I was
able to get a great deal on a set with the new rolled tips through a group
purchase on the Corvetteforum. Installation is very simple and -- although
I chose to have mine installed at Midas (bad idea) -- it's something you
could do yourself.
Once they're on -- be prepared to wake up the neighbors.
These babies are LOUD! Cabin resonance and drone is reduced at cruising
speed, and when you get on the throttle they SCREAM. My one piece of advise
-- get the x-pipe installed. It really smoothes out the sound and reduces
some of the popping when you decelerate.
click for larger images
Exhaust Links
Corsa Performance home page
Borla Exhaust home page
B&B TriFlo home page
Home installation
instructions
Buy
from "The Vette Doctors"
Buy from "Xtreme
Motorsports"
|
|
Vette Doctors X-Pipe
Can't do the the Corsa
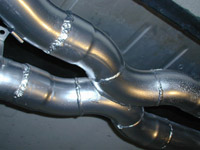
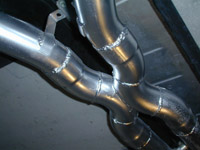
without the x-pipe install, as I quickly found out. Here are some pics of what
it looks like after my dad and I finished. We painted with some
"Aluminum" colored hi-temp paint so everything looks stock -
actually, it looks better than stock :). Hopefully, the dealership won't
notice when they're under the car.
click for larger images
X-pipe Links
Vette
Doctors X-Pipe order information
Bassani
x-pipe information
|
|
LIGHTING UPGRADE
You may have noticed the
stock headlamps and are pretty poor. This is a great, cheap upgrade to improve
your visibility and, really, they just look cool.
For the headlamps,
the parts you need are Sylvania Cool Blues 9005CB (hi-beams) and 9006CB
(low-beams). Both of these are 5w more powerful than the stock system. They are
not blue, but really a much whiter light.
Installation is
simple. Remove the headlight lids and the housing (6 screws and about 5 min.)
Remove the wiring clips (they snap right off), twist off the old lights,
twist on the Cool Blues, and put everything back together. It's a 20 min. job
to swap everything out.
The fog lamps are even easier. You're best bet is to do
this installation at the same time as the regular lights because the bulbs
are easier to get at with the headlight housing off, but it is possible to
get to them otherwise. Just swap out the existing lamps with some NAPA 885
(50w) bulbs. These replace the existing 893 (35w) bulbs and fit in the stock
location.
A few counter-clockwise turns of a T-15 torx screw will
adjust the lamps up so that you can actually see them. Mine were adjusted so
low I couldn't even tell they were on, now I have them pointed up so
compliment the headlights.
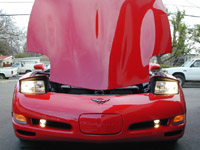
This isn't a great picture because it was taken in the
daytime, but the result is a much brighter, whiter light for headlamps, and
more useful fog lamps.
click for larger image
Links
Installation
instructions
Sylvania
On-line
Napa Auto Parts on-line
|
|
EUROPEAN TAIL LIGHTS
If you really want
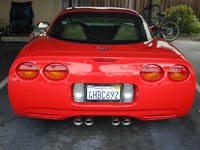
to add something unique to your vette, try the European tail light switch.
Although these aren't exactly what the euro lights look like (the euro lights
have amber centers on the outside and clear centers on the inside), I thought
amber all around would look the best. I got a great deal on these from Nate
at Xtreme Motorsports. You can get these from him in any combination, and
everything is genuine GM parts.
Original Lights / European Lights
Click Here for pictures of my
Installation
Links
Buy from
"Xtreme Motorsports"
|
|
C5 Center console Logo
This isn't technically a
modification, but I think it's a great looking addition to the interior. Go down
to your local Chevy dealer and pick up an extra hood emblem (about $20). Cut
the guide tabs off, clean the center console, remove the sticky
backing, and, voila! Cool interior dress-up!
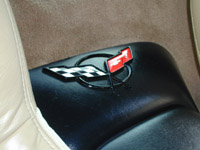
click for larger image
|
|
Zaino
Zaino is a little-known
polish product that you can't buy in stores. Far and away, it's the best
"wax" (it's not really a wax) you can get. I've included a few pics
of my car to show what kind of shine you can achieve. It's a fairly lengthy
process, but the results are SO much better than any regular wax I've tried.
Not only is the shine amazing, but there is no residue when you wipe it off,
and it has anti-static properties that actually repel dust! Amazing stuff.
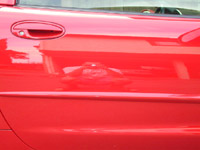 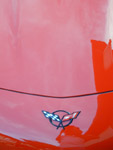
click for larger images
Zaino Links
Official Zaino Home Page
Corvette Forum Discussion on Zaino
Order
Zaino from Tony Barker
|
![]() E-mail me with comments, questions, or
if you want to send me free stuff. I love free stuff.
E-mail me with comments, questions, or
if you want to send me free stuff. I love free stuff.


