|
HOME – PAINT – INTERIOR – ENGINE - FINISHED CAR |
|
ENGINE One thing I decided
to do was see if I could get a bit more performance out of this engine. It’s
basically a cruiser, but having a little pep is always fun.
Aside from some
chrome dress-up goodies, I made several other improvements to the head thanks
to the Ford Six Forum. ·
’73 “big log” 250 head milled to 50cc’s ·
Installed 1.75 intake valves and hardened seats ·
Clifford port divider ·
4-angle valve job ·
Comp Cams 252H ·
Adjustable rocker arms from a ‘64 170 car with custom pushrods ·
Holley/Webber 5200 2bbl ·
Clifford 6-1 headers with 2in exhaust and Dynomax muffler
(installed in the V8 location) ·
Duraspark 2 Electronic Distributor with MSD Flamethrower coil HOLLEY 1946 1 BARREL This was the first
upgrade I did before the rebuilt head. The old Autolite 1100 1bbl carbs
(flowing 180 cfm) had some serious issues. The one in my car was running
incredibly rich, even after a rebuild. I replaced it with a later model
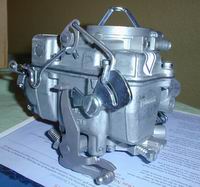
Holley 1946 that flows 195 cfm. This was a CARTER RBS 1 BARREL After upgrading the
engine with a later model head, the intake pattern no longer fit (the 75
heads have a 1.75 intake hole, vs. 1.5in for the ‘65 cars). So, I got a
Carter RBS carb (225 cfm) also from a ‘73 Mustang with the 250 engine. This
has proven to be a good carb, and I was able to modify it to fit with minimal
work. Although this is a good carb, I think I have enough cam and head work
to take advantage of a bigger carb. I’m looking now to install a progressive
2bbl carb.
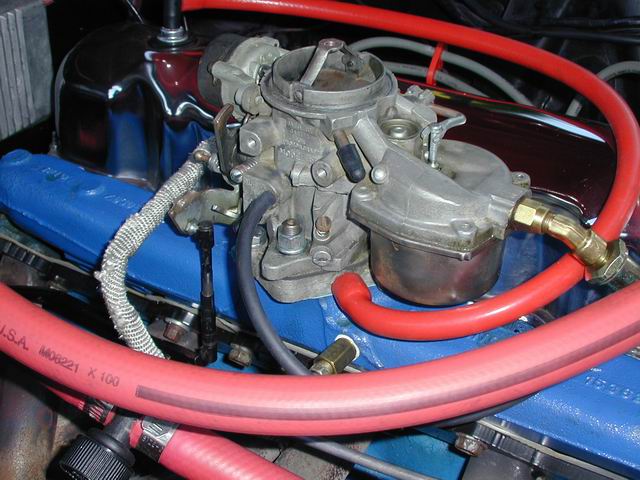
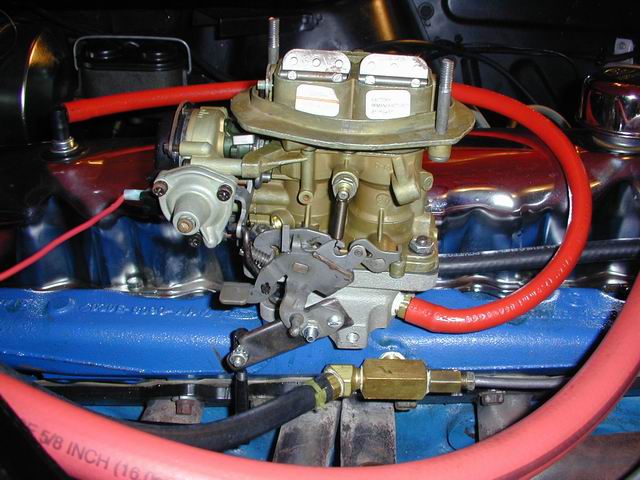
click for larger images HOLLEY/WEBER 5200 2 Barrel This is my current
setup. I purchased a Holley/Webber 5200 2bbl from Langdon’s Stovebolt.
These are rebuilt carbs at a very reasonable price (about $65). I made sure
to get one with the electric choke, because the stock water-valve choke would
be challenging to setup. There are several
2bbl options you have for these cars. There is a GREAT webpage showing two of the more popular choices,
along with comparisons of both Cliffords and Stovebolts 1bbl-2bbl adapters. I
chose the Holley 5200 for the price, and the Clifford adapter for the easier
installation. The stovebolt adapter will point the carb in the correct
orientation, but has drawbacks IMHO – check out the link above for details. This is the basic
setup. I ordered the following parts ·
Holley 5200 from Stovebolt
($65) ·
Base adapter from Stovebolt
(this costs about $8) ·
Clifford
2bbl Adapter ($60) (there are two versions of this adapter for the 1.5 and
1.75 intake holes) ·
Ford Motorsport 13in drop-base air cleaner ($30) This is an electric
choke carb, so you will need to hook up to a +12v switched source. I was told
that stock was connected to the black terminal on the alternator, so that’s
where I connected mine.
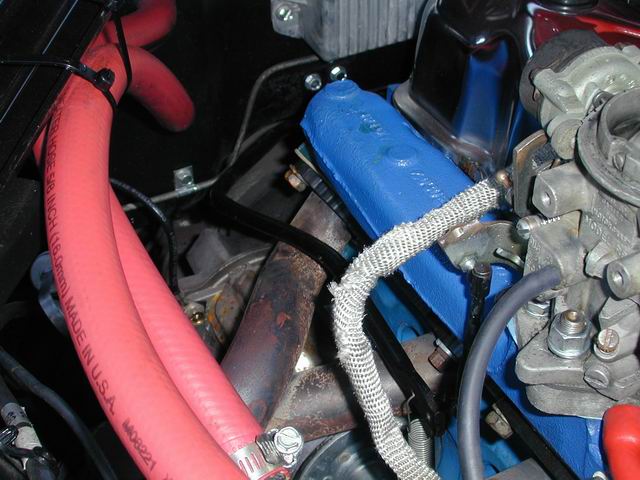
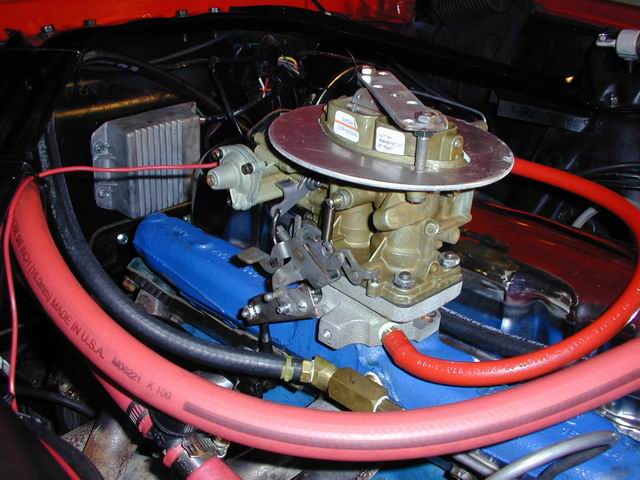
Click for larger images This is one of two
things you will need to fabricate. Although the linkage is on the correct
side, the arm from the throttle is not long enough. All I needed to do was
cut a 3in piece of thin aluminum and bolt it in the existing holes. I got
another pin from my local auto shop.
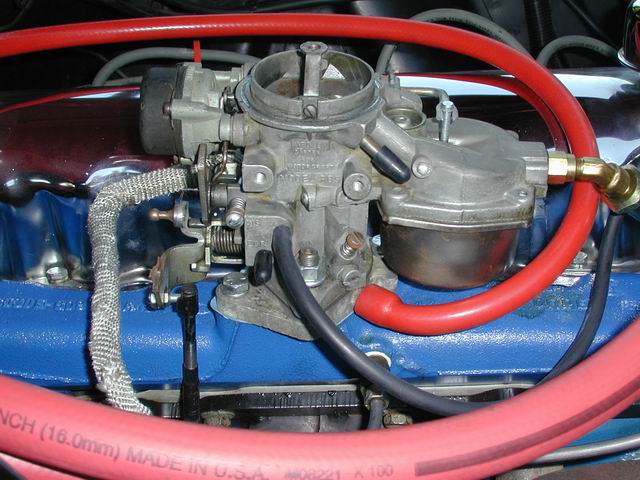
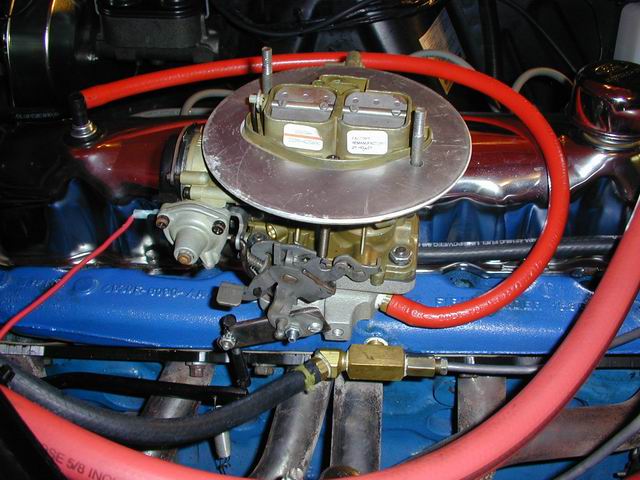
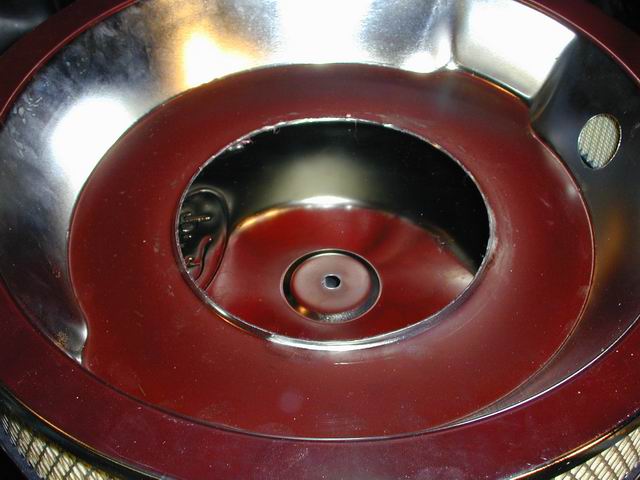
Click for larger image Next step was the air
cleaner. This was probably the most trial-and-error portion of the whole
install. Of course, if you follow this there is no trial and error! The first picture you
see is the Holley with Stovebolt’s adapter plate. This allows a standard size
air-cleaner base to mount on the oval 2bbl. Since my particular model had the
studs coming up from the base, I had to drill holes for them to pass through.
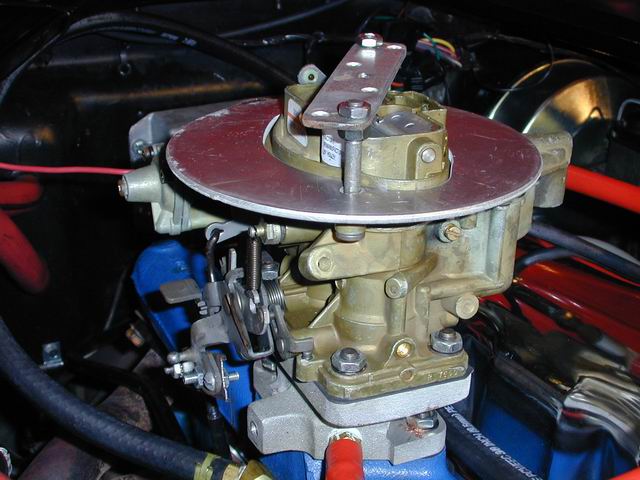
In the second
picture, I had to figure out how to attach a circular air cleaner. I didn’t
want to drill holes in the chrome, so I created a metal plate that mounted to
the two posts. Then I tapped a hole in the center that was the correct thread
size for the standard wing nut. Keep in mind that you need to leave enough
space for the throttle plate to open up completely. Important note here: the studs as they came were too long and did
not allow the air cleaner to mount all the way down. I had to cut the studs,
and re-tap new threads to go down farther. If you try and tighten the
wing-nut down w/o cutting the studs, you’re going to bend up your air cleaner
lid! Last but not least –
the air cleaner. The Ford Motorsport air cleaner, which I like very much, is
too tall and will not clear the hood. This is the same case with ANY large
air cleaner. In order for this to fit, you have to CUT the lip off the bottom
of the base so that it sits flush against the adapter. This gives about ½ in
more clearance. In the 3rd picture you see the bottom of the base
with the lip cut off. This is a perfect fit and the base clears all the
linkages, choke, fuel line, etc.
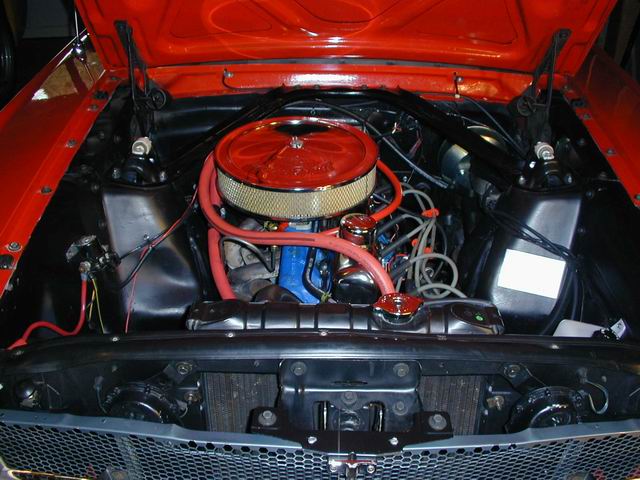
Click for larger images The finished product.
Very tidy, looks somewhat stock and perfectly functional. Just to be safe, if
you look closely at the enlarged image,
you will see the stock 6-cyl air cleaner wingunt. Just to insure proper fit,
I bent the ‘ears’ on the side down almost flat.
Click for larger image Now it’s all done!
Expect to do some tuning with these carbs. They were not jetted for this
application so you’ll have to fiddle with the mixture screws and jets. Once
it’s done, it’s an absolutely great carb. It has better off-idle torque
because of the smaller primary, and with the progressive 2bbl gives you more
fuel on the top end. AUTOMATIC OWNERS
- Don’t forget to adjust your throttle kick-down cable! For some when I moved
to this carb, the cable wasn’t engaging at WOT. This will cause the car to
seriously bog when you slam on the gas, because the car will not downshift!
Good luck! |


![]() E-mail
me with comments, questions, or if you want to send me free stuff. I
love free stuff.
E-mail
me with comments, questions, or if you want to send me free stuff. I
love free stuff.